Saturday, 22 December 2012

Christmas crafty Saturday: Almond snowflake cookies

Hi guys,
I love getting crafty, and Christmas is the perfect time to exercise my love of all thing craft with a real purpose. So I thought that every Saturday during December I would share one of my seasonal crafts with you guys.

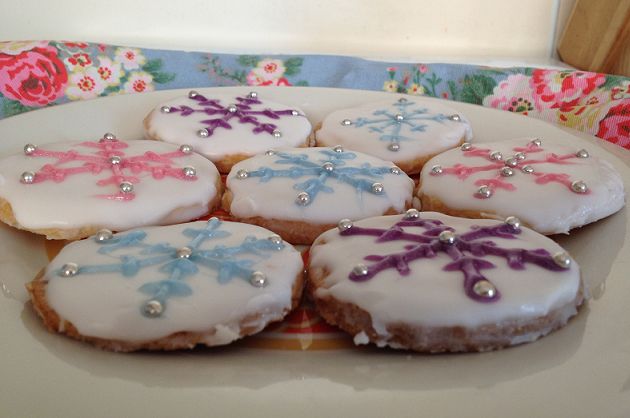
Well, Christmas is almost upon us (just three more sleeps to go!) So I thought that rather than give you guys another sewing project you won't have the time to complete, I would give you my favourite Christmas biscuit recipe. It's my favourite because they taste delicious and it's so so simple to make: even for a not especially proficient baker like me! (I'm not being modest: you can see how unproficient I am by how messy the icing is!)
Photobucket
Ingredients
250g softened butter
150g caster sugar
300g plain flour
3 tbspoons almond extract
250g icing sugar
Icing pens/embellishment for decoration

-These really are so simple to make that there are surprisingly few instructions! First pre-heat your oven to 180oC
-Using a large mixing bowl mix together the butter, caster sugar, and 2 tablespoons of almond oil
-Gradually add the flour until you have a large ball of pastry with a doughy consistency
-Roll out the biscuit pastry and cut out biscuit shapes with a cookie cutter (I used a simple round one)
- Bake for 12-15 minutes, or until the biscuits are starting to turn very lightly brown.
-Leave the biscuits to cool whilst making the icing: mix the icing sugar with the final tablespoon full of almond oil then add water until you have a thick paste consistency.
-Now it's time to decorate! Obviously you can decorate these however you want, but I like this easy to execute snowflake design: I just drew it on using an icing pen.

Mary Berry wouldn't be particularly impressed with my decorating skills, but this plateful of biscuits was so well received that it was munched down by my hubby in just one afternoon! Just three more sleeps to go until Christmas: I hope you all have a wonderful time!

Love Tor

Saturday, 15 December 2012

Christmas crafty Saturday: Make the giftwrap part of the present

Hi guys,
I love getting crafty, and Christmas is the perfect time to exercise my love of all thing craft with a real purpose. So I thought that every Saturday during December I would share one of my seasonal crafts with you guys.

In case you haven't noticed over previous years, I'm going to let you into a little secret. I really really love Christmas. Like I'm obsessed with Christmas! I love decorating our house, buying special presents for everyone I love, I even like writing Christmas cards - I know! I'm crazy! But another one of the things I love (and something I've gotten from my mum) is wrapping my presents, so that they look amazing and leave people excited to open them.

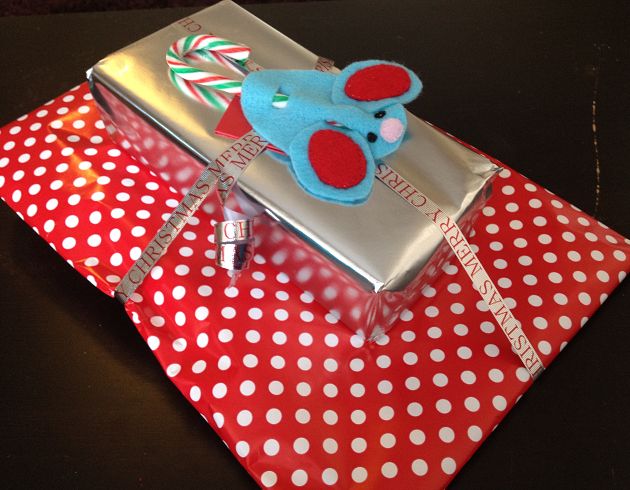
Over the years I've decorated my presents with personalised keyrings, christmas tree ornaments, and candy canes. I've seen gorgeous presents that have been decorated with lollypops, cookie cutters, and even homemade jewellery. When you add something to the top of the present, however small, the wrapping becomes part of the gift.
Photobucket
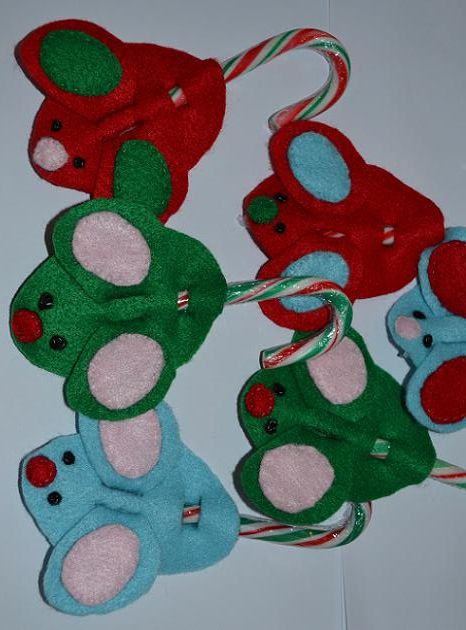
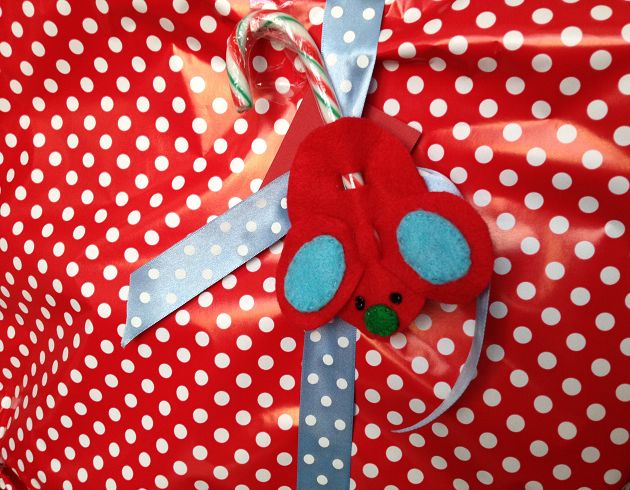
This year I'm decorating my presents with candy cane mice: felt mice which I'm made by hand and added candy canes to make their tails. You can find the Martha Stewart tutorial on how to make the mice here: note that I stitched mine together rather than using fabric glue recommended by Martha (who knew she was so lazy?!) and they looked much better for it.
Photobucket
Photobucket
For the wrapping paper I've opted for plain metallics or red: I always think if you're going to embellish then the embellishment shows up so much better against the background of plain paper. I also experimented a little with polka dots for that Cath Kidston feel. Other unusual wrapping paper options are to use brown parcel paper and even newspaper: both guaranteed to make your presents stand out when they're underneath the tree!

How do you wrap your Christmas presents? Do you like to make the wrapping into something special, or do you prefer to spend more time on getting the right gift? I wonder if it's part of being a blogger than means I like literally everything I do (even giving a present) to be something that's aesthetically pleasing!

Love Tor xx

Wednesday, 12 December 2012

Stylized Christmas home envy!

Hi guys,
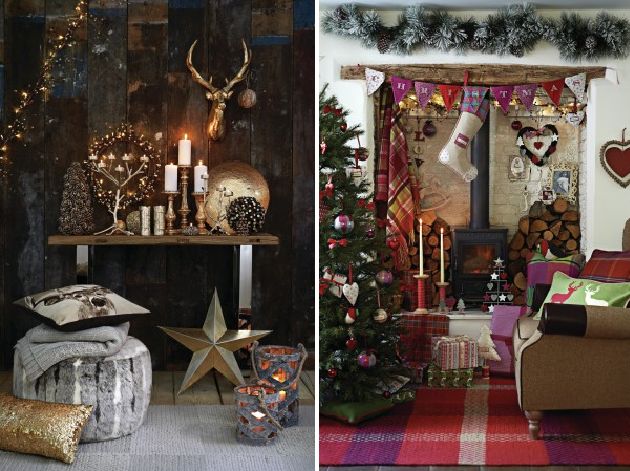
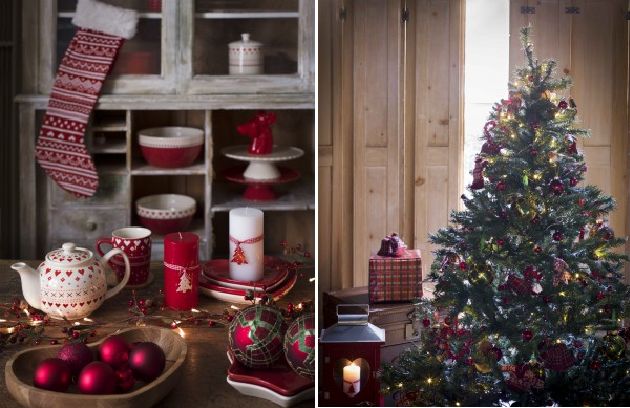
I'm a bit of an interiors obsessive: I love checking out other people's home decor, and am forever drooling over interiors blogs (I like to call it house porn!) And if there's one time it's especially nice to see what creative ideas people have for their homes it's Christmas. It's not just interior blogs jumping on this band wagons either: the big department stores are hopping all over it too!

I love checking out the photo shoots that the big department stores put out to promote their Christmas decorations and interior ranges. It used to be that preparing for Christmas meant putting up a Christmas tree. But now you can buy new Christmas throws and cushions, art work, kitchen utensils and even bedding. (Primark have some great Nordic reindeer-print bedding instore, and it's only £15) And I love it!

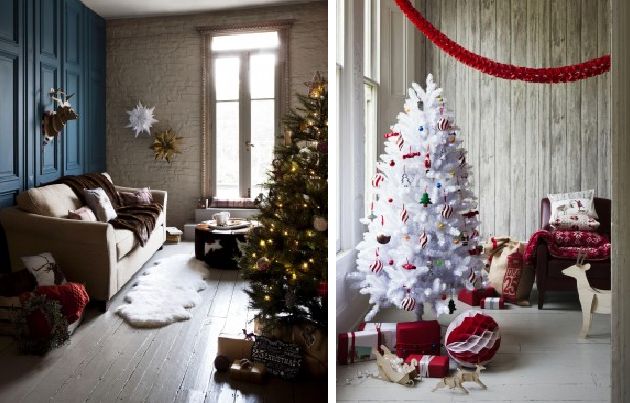
Here's some decorating inspiration gleamed from the stores you'll find on every highstreet:

Marks and Spencer
Photobucket
Next 
Photobucket
House of Fraser
Photobucket
How do you decorate your home for Christmas? Do you take interior inspiration from blogs and press images and go abit over the top (guilty as charged!) or do you think these things are going a bit too far?

I'll be showing you how we decorate our house for Christmas later in the month. But in the meantime, I'd love to hear your thoughts!

Love Tor xx

Saturday, 8 December 2012

Christmas crafty Saturday: How to make Christmas stockings

Hi guys,
I love getting crafty, and Christmas is the perfect time to exercise my love of all thing craft with a real purpose. So I thought that every Saturday during December I would share one of my seasonal crafts with you guys.

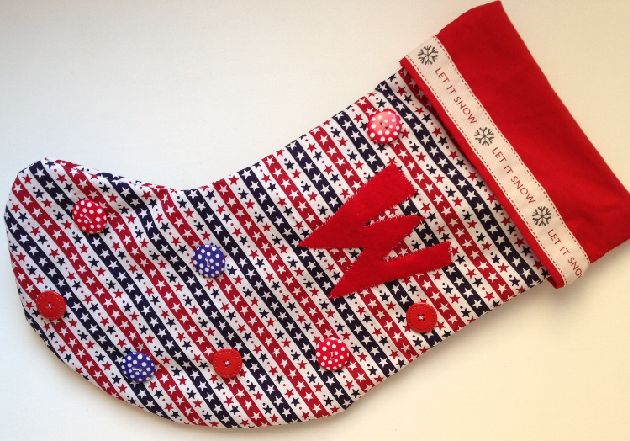
I like to create my own little presents for people, as well as decorations for the house: this year, for the first time, I tried my hand at making a Christmas stocking. It turned out so well that I'm going to show you how I made it so that, if you're feeling so inclined, you can try your hand at making your own:
Photobucket
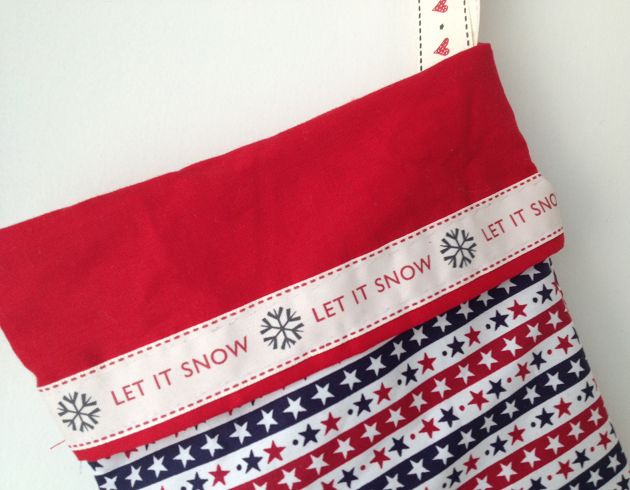
I kept this really simple and used just two different cotton fabrics, cut out a felt letter, and then ribbons and buttons for the trim. But obviously the only limit to what you can make is your imagination: use velvet, add flowers, diamante, write your name on it with fabric paint. It really is up to you!

You will need:
2 sheets A4 paper to cut the pattern
1/2 meter patterned fabric
1/2 meter plain coloured fabric
Coordinating cotton
Embellishments (I used felt, ribbon, and buttons)
PhotobucketPhotobucket
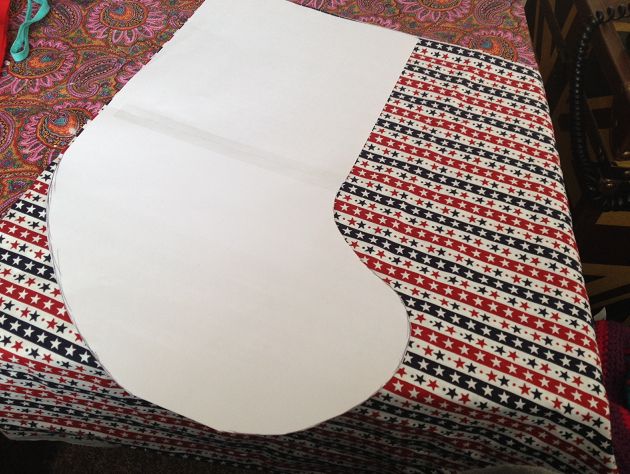
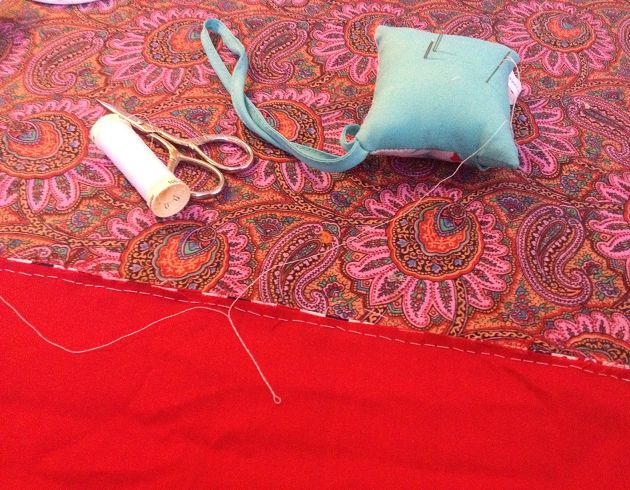
1. Cut out a stocking template pattern onto your sheets of A4 paper: this will be the template you use to cut your fabric. I drew and redrew mine by hand until I had the shape I wanted.
2. Cut the template 4 times; twice on each of your fabrics. Remember to turn the template around when doing the back panel of the patterned fabric, so the pattern will still show when the stocking is assembled.
3. Place the fabric with the patttern to the inside and the lining to the outside and then stitch the four pieces of fabric together: I used a simple running stitch. If you want to create this even quicker, you could use a sewing machine. Turn inside out and voila: you have your very own simple-to-sew Christmas stocking!
4. Embellish away to your hearts content! And don't forget that if you want to hang your stocking you'll need to add a ribbon loop to the corner.
Photobucket
PhotobucketObviously this one is entirely for my own satisfaction, as the baby will be far too young to appreciate Christmas or stockings. But he'll only get one first Christmas, and I intend to suck as much joy and fun out of it as possible!

So what do you think? Do you think you'll have a go at making your own? If you do, I would LOVE to see how it turns out; email me a picture!

Love Tor x
PS - Don't forget to enter my Christmas giveaway: there is a great selection of little prizes to be won!! 

Sunday, 2 December 2012

Our house: All decorated for Christmas

Hi guys,
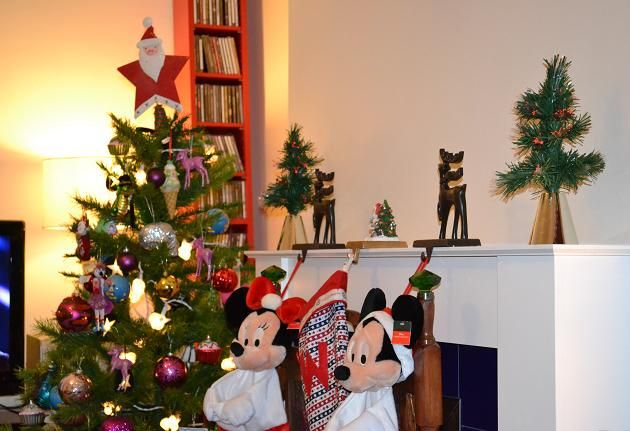
I love Christmas. Actually that's an understatement: I LOVE Christmas! So as soon as December 1st rolls around, I want my house decorated immediately. Because of course, why not maximise the amount of time you can spend looking at glittery decorations and twinkly lights, right? True to form, yesterday we built our grotto whilst listening to our specially crafted Christmas playlist. Here's how it looks:
Photobucket
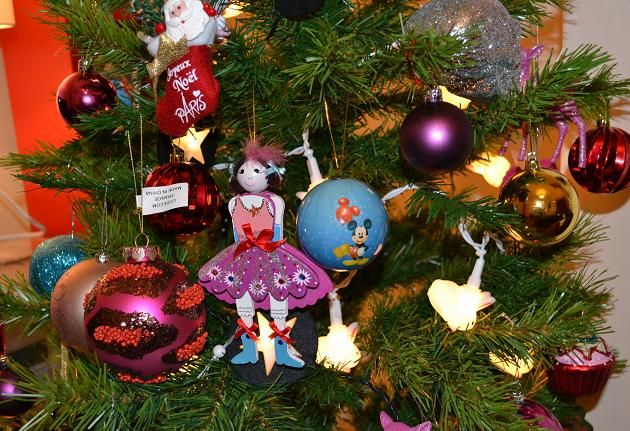
-Nothing on my tree matches! It's a mish-mash of colours and styles: but that's because each bauble is special. My mum started it, buying my sisters and I special Christmas baubles to remember every year starting from when we were born. And now Mike and I pick up ornaments on our travels together: we have one to remind us of our wedding day, our honeymoon, even one that says "Our first Christmas together". I think it's a great tradition and makes putting up the tree even more special.

Photobucket
- I love poinsettias: they're so festive, and cheap too! This one cost me just £2.50 from Asda. It has pride of place in our fireplace, and the great thing is (if I remember to water it!) it will last for the whole of December!

Photobucket
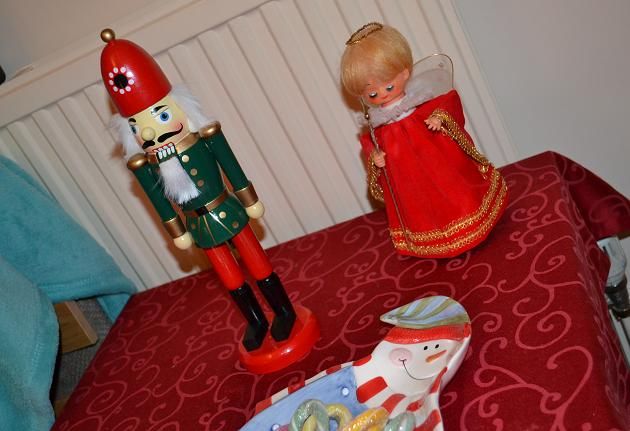
- We picked up the nutcracker in Berlin last December. The 70s-style angel was a gift from my mum: something she and my dad have had since they got married. And it just wouldn't be Christmas without a plate full of candy canes to nibble on every time you walk past it!

Photobucket
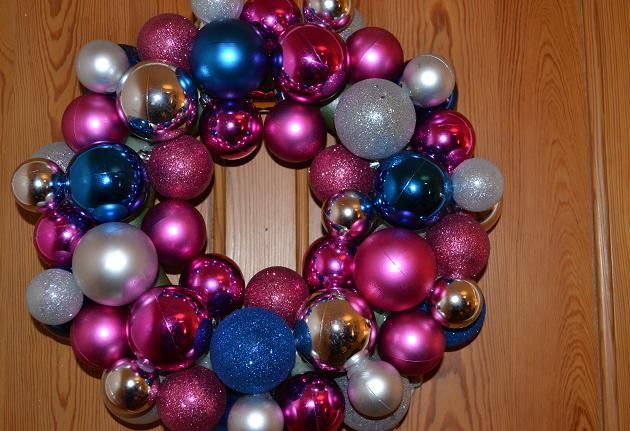
-Our non-traditional Christmas wreath. I saw one just like this in a fancy design shop, but it was soo expensive. Luckily, my mum is a craft monster and a genius with a glue gun: she managed to replicate it completely for me. I think it looks amazing!

Photobucket
- This is our first year of having a proper fireplace for Christmas, and I love it! Our stockings are all hung up and ready in anticipation. Mike and I have Mickey and Minnie ones, brought in Florida. The baby has his own which I made myself: tutorial on how to make one to follow next weekend!

Photobucket
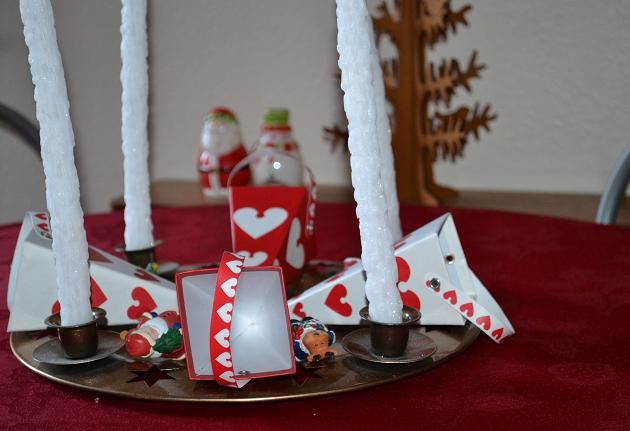
- Finally the focal point of any home at Christmas: the dining table. My centrepiece is an advent ring. The sweet cones are from Ikea: it's hard to fill them fast enough when Mike is around! We also have a full Christmas dinner service: you really can't avoid the fact that it's December in this house!

Have you put your Christmas tree up yet? How do you like to decorate for Christmas?

Love Tor x

Monday, 22 October 2012

How to carve a pumpkin

Hi guys,
Pumpkin carving is something of an annual Halloween tradition in the Fabfrocks household: hubby and I carve a pumpkin each every year, and compete to see who can create the best design! But if you've never carved a pumpkin before it can be quite daunting. Which is why I've written this quick step by step tutorial (complete with pictures) so that you can create a scary Jack-o-lantern of your own!
Photobucket
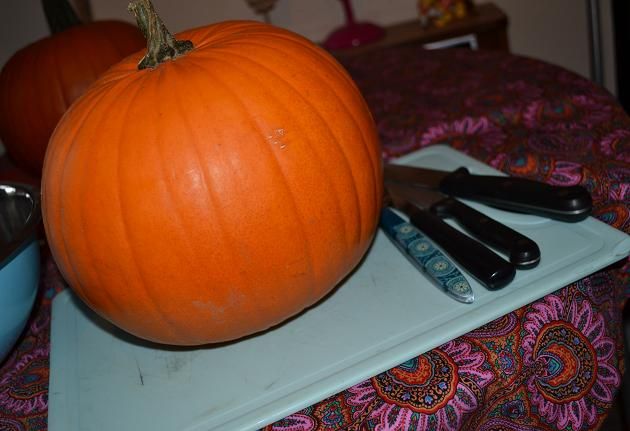
1. You will need: We don't buy special pumpkin carving kits, we just use the tools we have in the kitchen. We use a sharp knife, a blunt normal eating knife, a spoon, and an ice cream scoop. You will also need a biro to draw your design template.
Photobucket
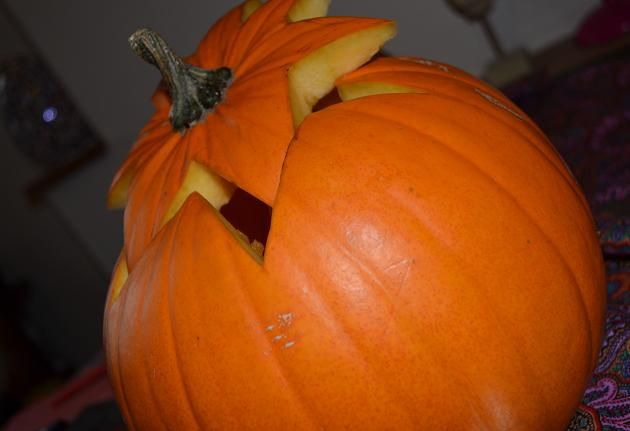
2. First you need to do your prep work. Take a sharp knife and remove the top of the pumpkin: traditionally this is done in the shape of a simple circle. I like to create a star shaped lid. Once you have removed the lid comes the boring bit: emptying the pumpkin! Remember that the more of the flesh you can remove, the longer your pumpkin will last. I use a spoon and an icecream scoop to remove as much of the flesh as possible.
Photobucket
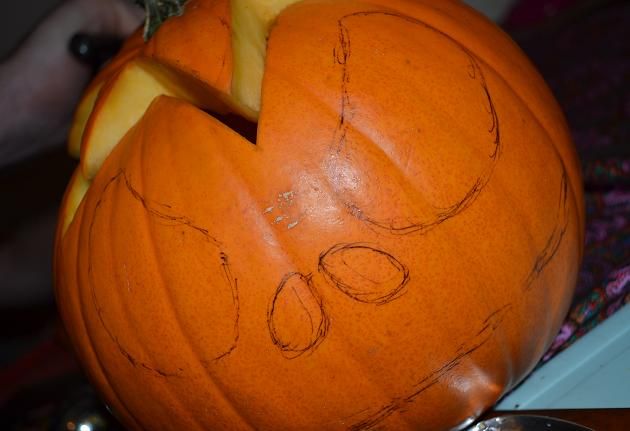
3. Choose your design. Google images is a great source of inspiration for this! Once you know what you want your pumpkin to look like, take your biro and draw your design onto the front of your pumpkin: this will provide the template that you will cut out.
Photobucket
4. Get cutting! Take the sharp knife and remove the skin and flesh from your design. I then use the blunt knife to smooth the edges as much as possible: I find it much easier to control and stick to the design that way.
Photobucket
5. Insert your candle, light you're pumpkin, and put it in your living room window so that it can frighten all the children on your street....Mwah hah hah!!! It really is that easy!

Have you carved a pumpkin for this Halloween? What design did you go for? I'd love to see your pumpkin pictures!

Love Tor xx
Monday, 24 September 2012

Our house: The circus themed nursery

Hi guys,
We have been living in our new house for almost four months, and slowly but surely, it is starting to look like a home I am proud to live in. Last month I showed you the final version of my walk-in wardrobe. This month, we have finally (very nearly!) finished the baby's nursery. So here's the tour:
Photobucket
Photobucket
Photobucket
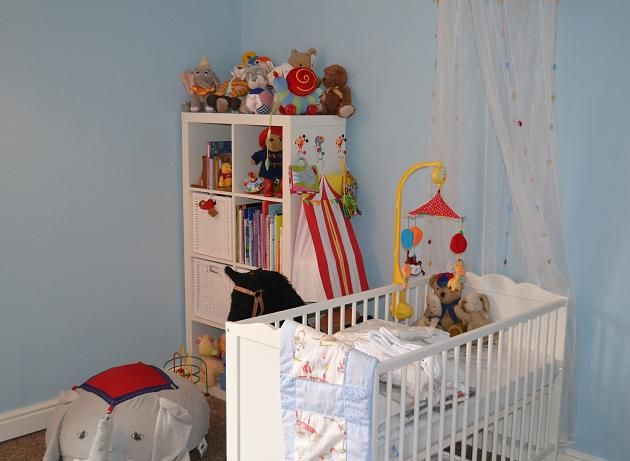
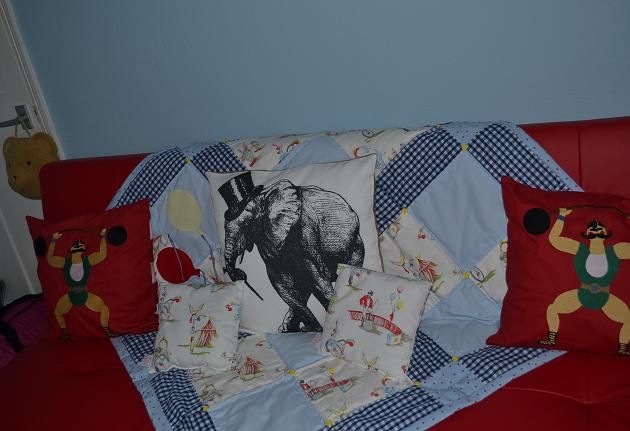
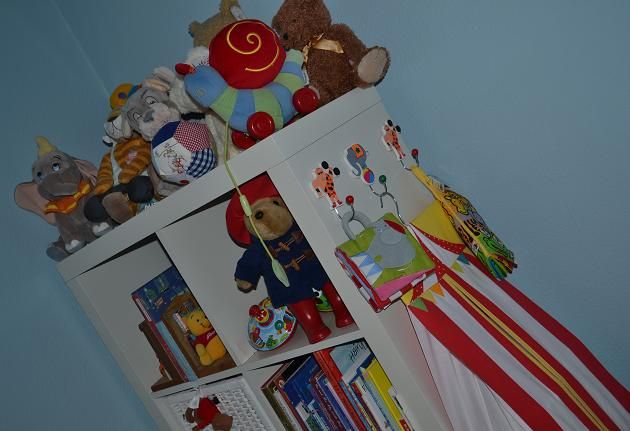
The shelving unit, cot, and wardrobe are all from good ol' Ikea. We changed the knobs on the wardrobe door to make it look a little more unique. The red double sofa bed was already a spare room feature, but we decided to keep it as a big comfy seat to watch him sleep/play/whatever, and as a spare bed for overnight visitors: we only have a 2 bedroom house, so it's important to maximise space.
Photobucket
Photobucket
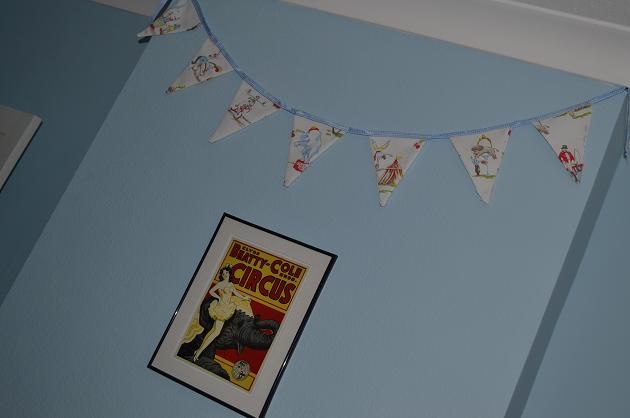
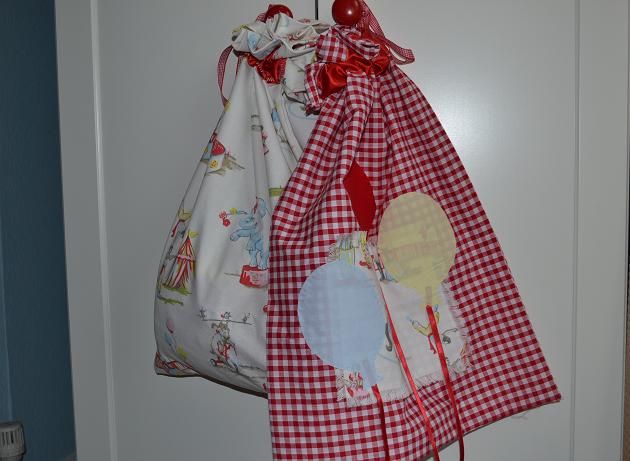
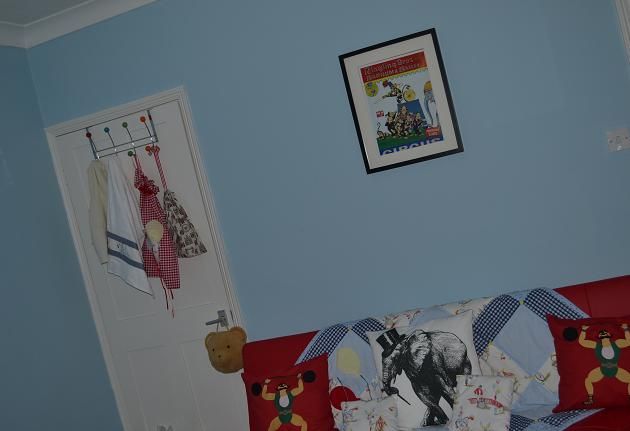
The vintage circus posters (which we talked about here) are all from eBay. The cushions on the sofa are from Cath Kidston, Etsy, and Little Joules. Cath Kidston does a vintage circus print fabric that I absolutely fell in love with. So I made some bunting using it, and then enlisted my much craftier mum to make all the other soft furnishings in the room using the fabric: She made the cotton bags hanging from the wardrobe doors, the huge sofa throw, and the quilt on the end of the baby's cot. She even used the circus print fabric to trim his little towels: now that's attention to detail!
Photobucket
Photobucket
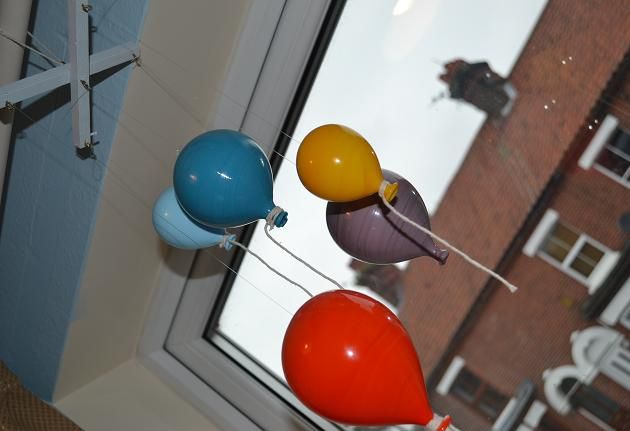
The glass balloons hanging in the window are from Murano; the glass island off Venice. We picked them up when we were there last month and my dad made the frame so we could hang them. The giant elephant seat is another Ikea purchase and he already has more bears, books and toys than any little boy needs: and he isn't even born yet! With that and his fancy wardrobe full of clothes, I think it's fair to say we've gone a little over the top.

All we have left to do is buy a light fitting (we're finding it really hard to choose!) and make the curtains. I've bought the fabric: red and white striped, like a big top. I just have to get my sewing machine out, sit down, and actually make them!

Love Tor xx
Saturday, 1 September 2012

Our house: My walk-in wardrobe

Hi guys,
It has always been a fantasy of mine to have a walk-in wardrobe. A room where I could keep all of my clothes and accessories, plan outfits, a relaxing fashion space that was just for me. So when we moved into a house that had a box room which could only be accessed from the main bedroom my first thought wasn't the same as everyone elses ("nursery!"). No: my first thought was '"wardrobe!" I promptly gave my husband full reign of the built-in wardrobe in the bedroom, and my mission for this weekend was to a) finally unpack all my clothes (it's only been 3 months!) and b) set about creating my dream.
Photobucket
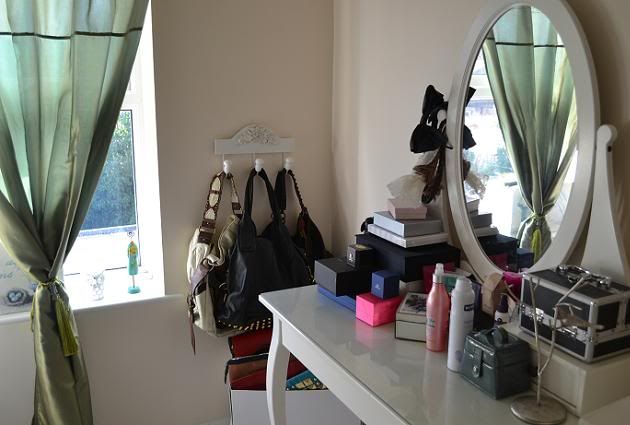
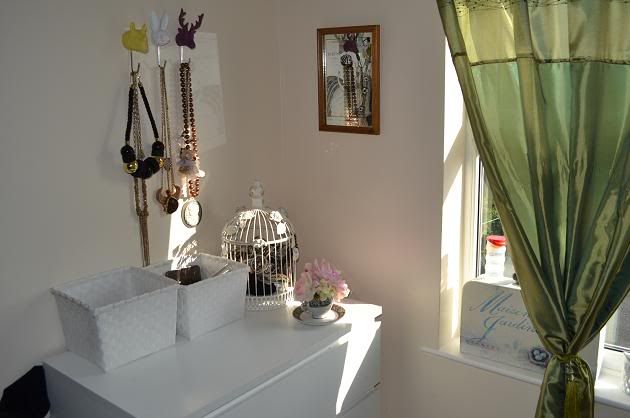
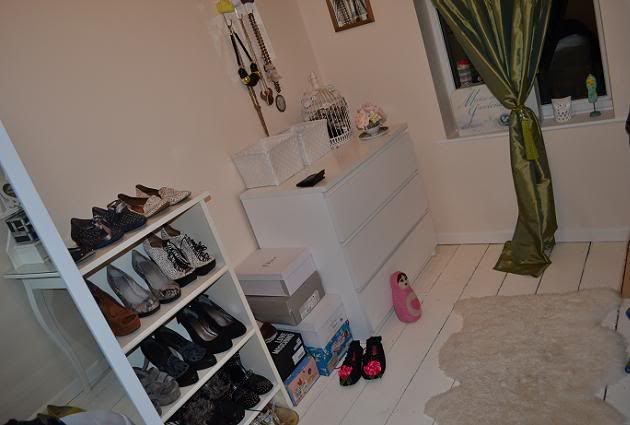
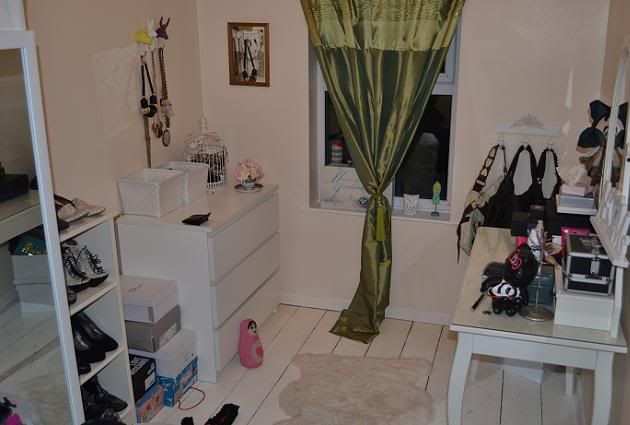
The main thing was that I wanted to turn the room, effectively a blank canvas, into a wardrobe on a tight budget. So I utilized the big wardrobe, chest of drawers, and dressing table that we already had from our old flat. I then brought an £8.99 hanging mirror from The Range which I've hung over my wardrobe door, storage boxes from John Lewis for my handbags (£9 each) and from Asda for my make up and jewellery (£4 each).
Photobucket
Photobucket
Photobucket
Photobucket
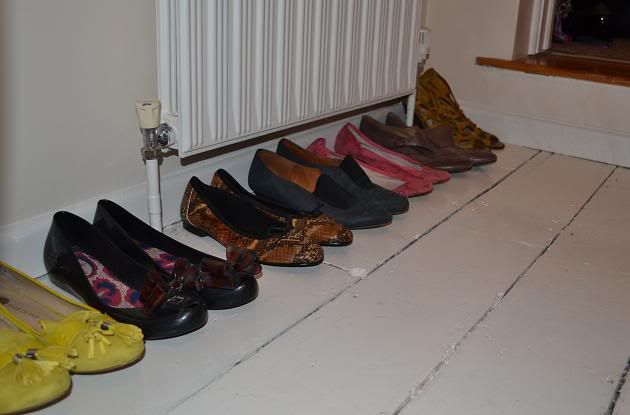
Finally I wanted a clever storage solution for all my shoes, in a way that I could see them and the pairs I wear most often could be on display. And a comfy chair, so that I could view my domain for hours without hurting my back. So we hit some second hand furniture stores and picked up some shelves for the shoes for £20. Sadly I couldn't find an armchair I liked, but the hunt is still on!
Photobucket
Photobucket
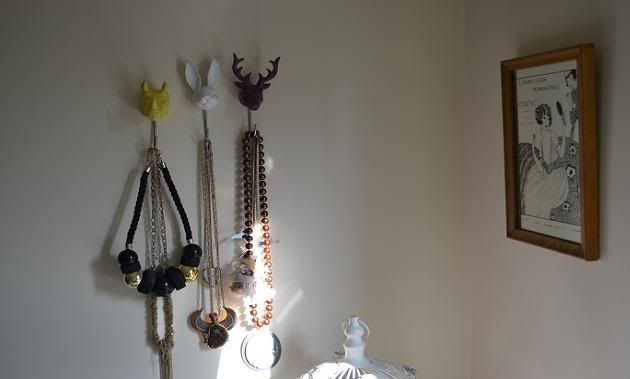
The plan was that turning this space into a workable dressing room shouldn't cost more than £100: I managed to achieve my goal and have only spent £65 so far, including the hooks and trinket boxes and other bits and pieces I picked up. That means I have £35 left to find that elusive armchair. Pretty impressive, even if I do say so myself, and not bad for a weekend's work!!

Now I will admit this isn't quite the walk in I always dreamed of. What I would really like is an open floor to ceiling wardrobe across one whole wall, so that all of my clothes were always on display. But as we're renting this place, fitting something that big to the walls just isn't feasible. And so, for now, this is my version of the dream! I'm really looking forward to getting dressed tomorrow morning....

Love Tor x